
CTE Summer Conference 2017:
Introduction to Vector Graphics Workshop
|
Welcome!
The lessons we will do below is meant to serve as a simple introduction to Adobe Illustrator, all of which you can do with your students in your own classrooms. In addition to this page, please feel free to explore the rest of the site. |
Workshop Taught by Emily Scoggins
Wakefield High School, Raleigh, NC |
An Introduction...Before we can begin to learn how to draw Vector graphics, we need to know what are Vector graphics.
|
| ||
Adobe Illustrator....let's start here |
Theses are great introduction videos to Illustrator by Adobe
|
|
All Worksheet Files: Adobe CC 2016
|
All Worksheet Files: EPS Versions
| ||||
The Tools
You have been given a copy of the Illustrator Tools Worksheet, also available for download to the right. You will need to complete this sheet before moving on the the activities below. It is always a good idea to get familiar with where various tools are located and what the keyboard shortcuts are. You will be turning this into the bin to Scoggins for a classwork grade. Keep this sheet as a reference for later on.
|
| ||
Learning the Pen Tool
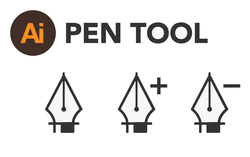
The Pen tool is the best tool in your illustrator toolbox. Once you have master this tool, it opens up so many different drawing possibilities to you. It allows you to create very simple shapes to very complex ones. You have used this tool once before in Photoshop in the Graffiti project, but now we will explore it in greater depth.
Let's start with The Bezier Game, the link is to the right. We will spend 1 hour on this game. When the hour is up, Scoggins will record your score. The game is to help start you off with the fundamentals of creating basic shapes using the pen tool. Next, download the pentool exercise .AI file to the right to start this lesson on using the Pen Tool. You simply follow the numbers and the instructions to complete the exercise. The point you need to aim at in each step is the center of each numbered colored dot. The top layer is the"working layer". This is the layer you'll be working on. Make sure your fill color is empty so you don't block the directions. There are 3 different colors: blue, red and green.
For more practice, I had added another follow the instructions worksheet called vector pen tool exercise.AI sheet and the Adobe Pen Tool Game. |
Extras:
| ||||
Basic Shapes
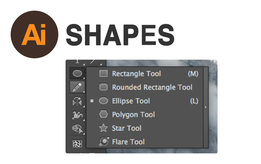
Now that you have mastered the Pen tool, next we will work on how to use the shapes already built into Illustrator. Start with downloading the Basic Shapes.AI file to the right.
Use the link found to the right called the Fundamentals of Shapes. You will need to create the shapes found in the tutorial on the first Art Board. Follow these directions to show how to use basic shapes to create new ones. On the second Art Board, create the shapes you find in the file here without a guide, using ONLY other shapes, create the shapes you see here. Create the shapes on Layer 1. Save this as Last Name + First Name + Period + Basic Shapes and put into your Intro to Illustrator Folder. |
| ||
Extras:
The Pathfinder Menu
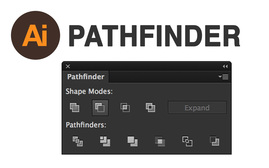
Sometimes it is easier to work with 2 shapes to than to draw the entire thing by hand. In this lesson you will be creating creating some basic shapes following the step by step directions on both worksheets. Its a simple one! Download the Pathfinder worksheet .AI file first. Using the shapes I provided, select these and follow the directions to create new shapes.
Now download the Pathfinder Advanced . AI file. Just create the shapes shown in the original. Use the pathfinder tool indicated in the directions. Your goal is to make YOURS look like MINE. Save your file as Last Name + First Name + Period + Pathfinder worksheet and put into your Intro to Illustrator Folder. |
| ||||
The Alignment Menu
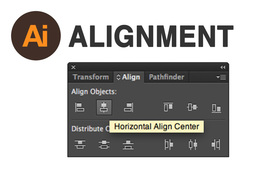
Learning to let Illustrator do some of the work for you is always best. Using the alignment tool is super helpful in making sure all of your elements are perfectly placed. Download the Alignment worksheet .AI file found to the right, and following the instructions to complete the 4 activities.
Simply select the objects I have provided and use the alignment tools in the instructions. Save your file as Last Name + First Name + Period + Alignment worksheet and and put into your Intro to Illustrator Folder. |
| ||
Image Trace

|
Learning to use the Image Trace function can be very helpful when drawing in Illustrator. Download the image of the lions to the right and the image and Image Trace Worksheet .AI file. Drag the image into each box on the worksheet in Illustrator and select the image. Select the image Trace menu and create the image as 4 separate image trace images and look at how it changes:
|
| ||||
Gradients
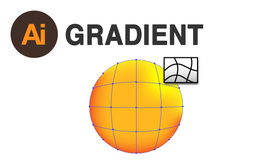
Learning to use gradients in a fundamental in creating more realistic drawings in Illustrator. Download the Gradient worksheet to the right, and follow the instructions and create the 4 gradients. The 4th question asks you to create a Gradient Mesh egg, once you draw your oval, select it and go to the Object menu > select Create Gradient mesh. You will use the Direct Select tool to isolate the anchor point whose color you wish to change. Think about the demonstration Scoggins did in class! Save your file as Last Name + First Name + Period + Gradient worksheet and and put into your Intro to Illustrator Folder.
|
| ||
Using your Layers
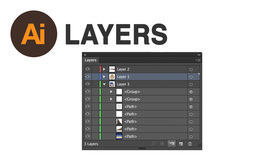
You will need to download the Layering Activity.AI file found to the right. Use the instructions in How to Organize Layers and the Youtube Video in order to group and rearrange the layers in order to optimize and fix the .AI file I have given you. Use the image found to right to see what the final drawing is suppose to look like. Be carful to make sure you get all the layers group together so all things are visible. Create layers for each ghost, the jack-o-latern, and the background and name each layer accordingly. Then put all the shapes and paths in the correct order to make your image match my image.
Save your file as Last Name + First Name + Period + Layers and put into your Intro to Illustrator Folder. |

| ||
